
iOS 14 Update: The Secrets Everyone's Keeping
Step-By-Step Tutorial
After going through countless unhelpful videos the day the update came out, I’ve finally figured out how to update my home screen to give me the aesthetic I want!
I’m no expert and I’m sure there is so much more you can do, but to make sure no one had to search for hours like I did, I’d thought I share how I did mine, step-by-step.
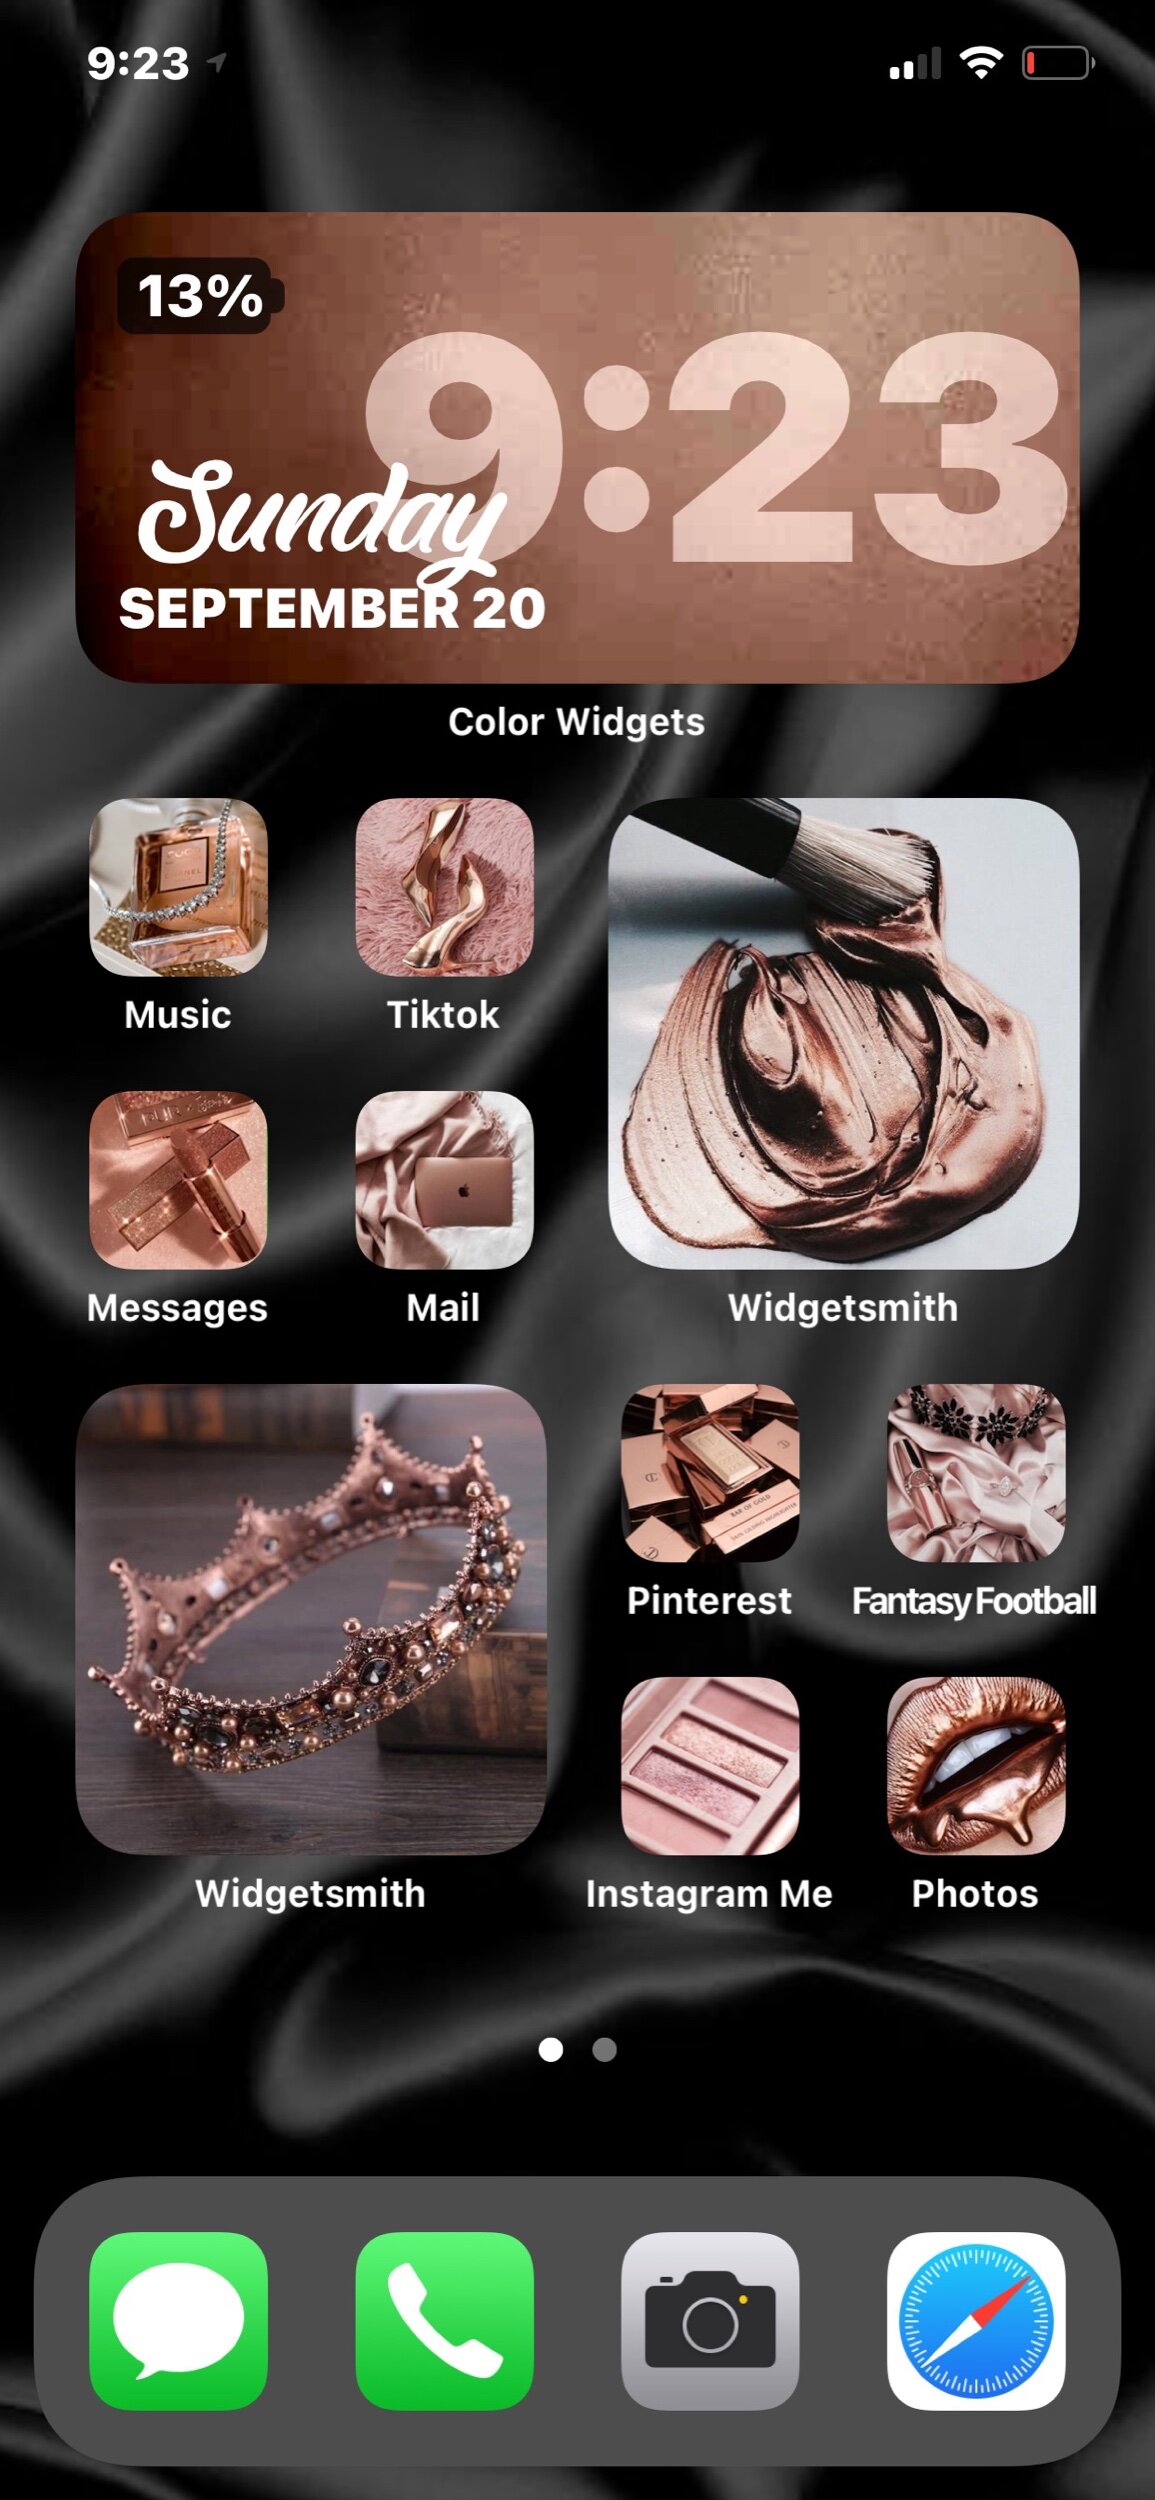
(And, yes, my phone is always almost dead.)


What you’ll need to get started:
iOS 14 update installed
Shortcuts app (free)
Widgetsmith app (free)
Colorwidgets app (free)
Photos, color palette, mood boards, icons
Here’s a step by step of how i did it:
(Screenshots of steps below)
Grab your photos and icons first: I came up with a color palette and aesthetic and then started collecting photos and color backgrounds. I used Pinterest and some free stock photo sites like Unsplash, Pexels, Pixabay to find some photos that spoke to me and my aesthetic.
It’s important to have the pictures you think you’ll want to use before you start these steps (although, if you’re like me, you’ll probably end up going back and changing them anyway)!
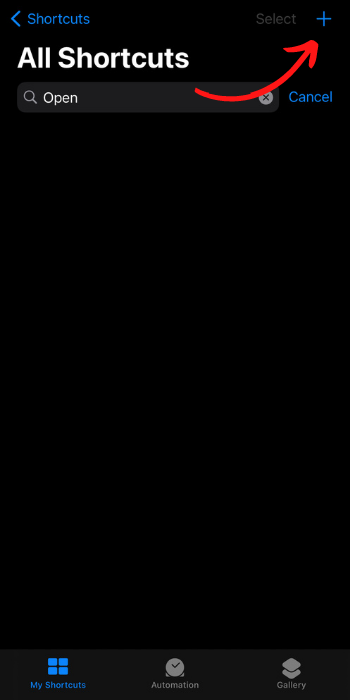
Step 1 - Open Shortcuts: If you can’t find this, pull down from the top of your home screen and open the search bar, type in “Shortcuts”.
Step 2 - Add a New Shortcut: Click on the Plus Sign (+) in the top right corner to add a new one.
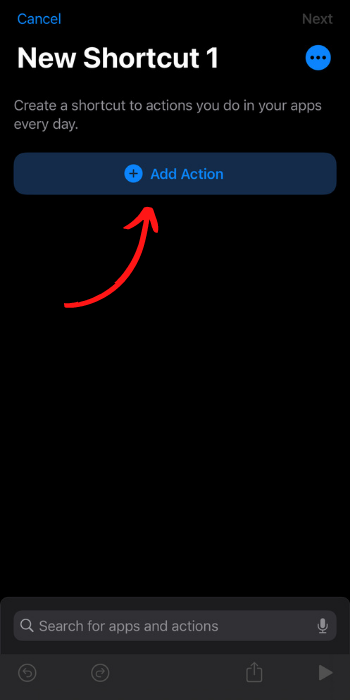
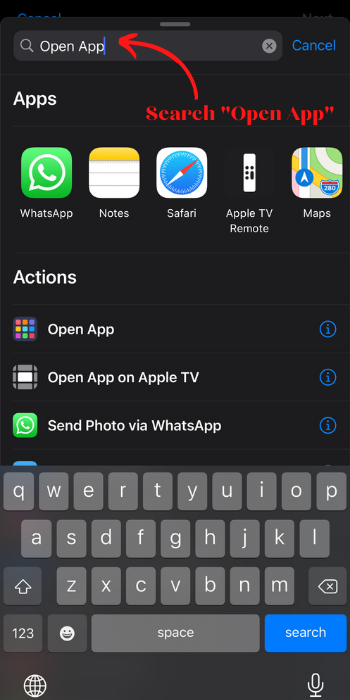
Step 3 - Click Add Action and Search ‘Open App’: Click Add Action and then search “open app.” Not much more to add here. (You can also choose “Scripting” instead of “Open App”, both end up doing the same thing, in case you’ve seen other tutorials.)
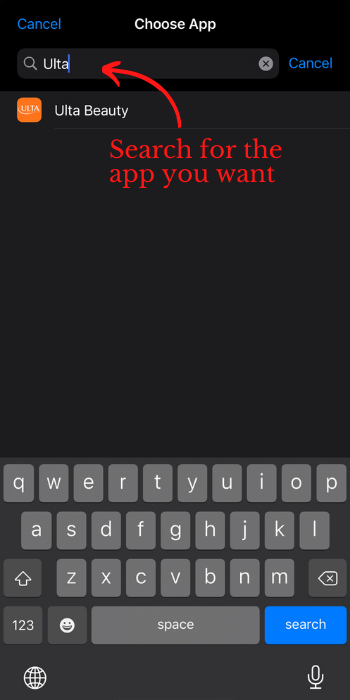
Step 4 - Select the App you want to customize: Click on blue “Choose”. This is where you’ll be able to select the app icon you want to customize. Click on the app you want to add; for example, Camera or Pinterest.
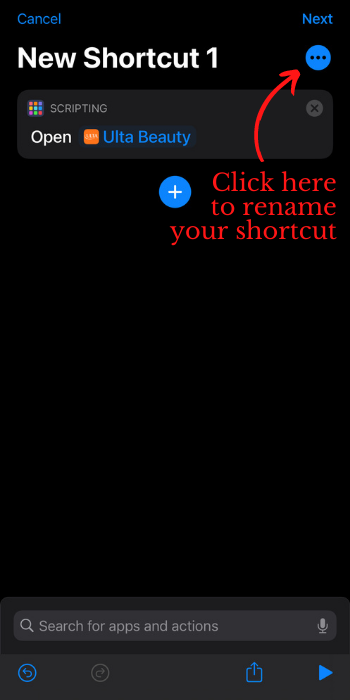
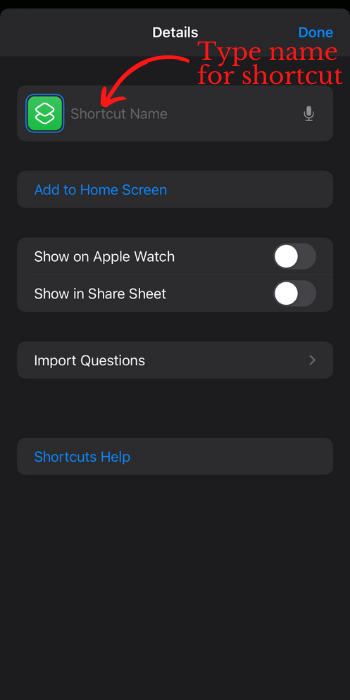
Step 5 - Name your shortcut: Click on the three dots (…) at the top right to rename it. Tap next to the Shortcut Icon and it will allow you to type. This is what keeps it organized in your shortcuts, in case you have to edit it later, so I would name it the actual name of the app so you can find it later.
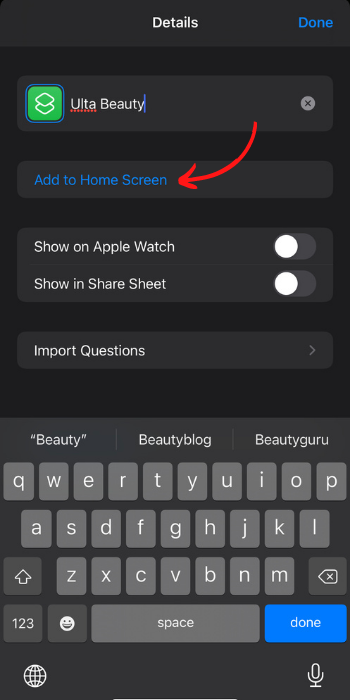
Step 6 -Add your shortcut to the Home Screen: Just click “Add to Home Screen”.
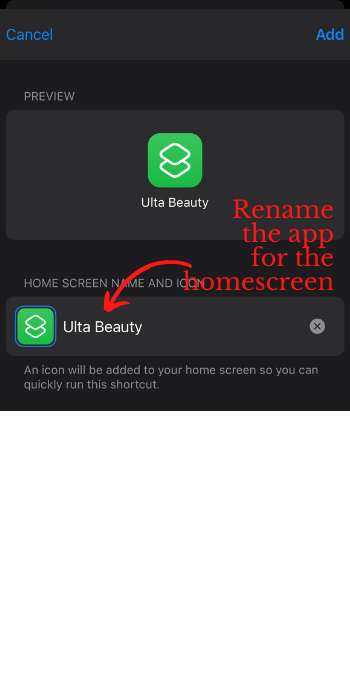
Step 7 - Name your new Shortcut: Click the small ‘x’ and type in the name you want it to say on your Home Screen (this is where you can be creative and have fun with it)!
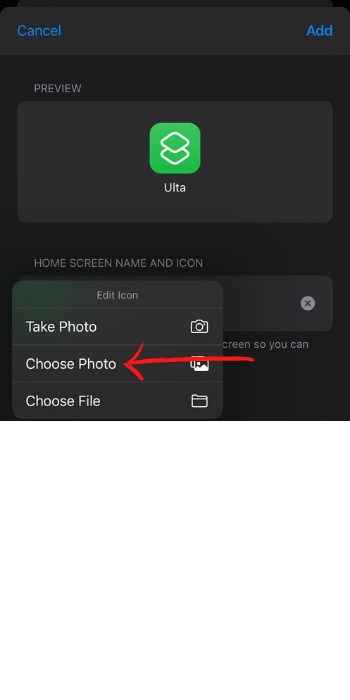
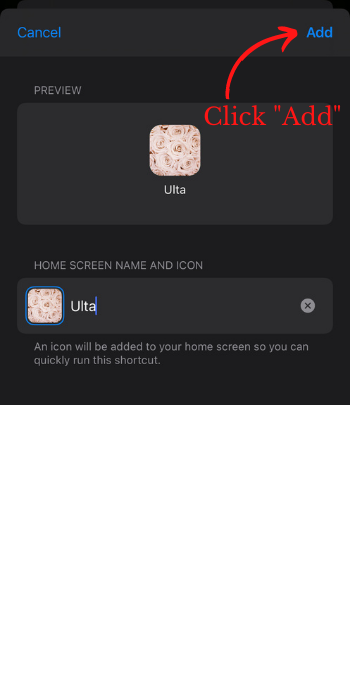
Step 8: Add a Photo Cover to your Shortcut: Click the small shortcut icon to the left of the name you chose (not the big one in the center). This should bring up a drop-down where you can choose to Take Photo, Choose Photo, or File. Select “Choose Photo” and this is where you’ll plug in a pretty photo or color of your choosing and click Add.
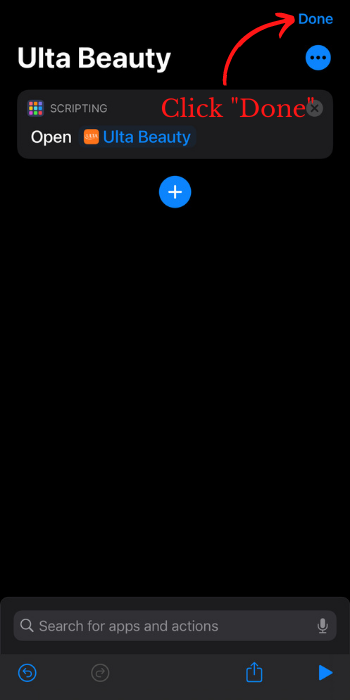
Step 9 - Click Done and Done again: Yes, that was two times! If you only click done once, it will break the shortcut.
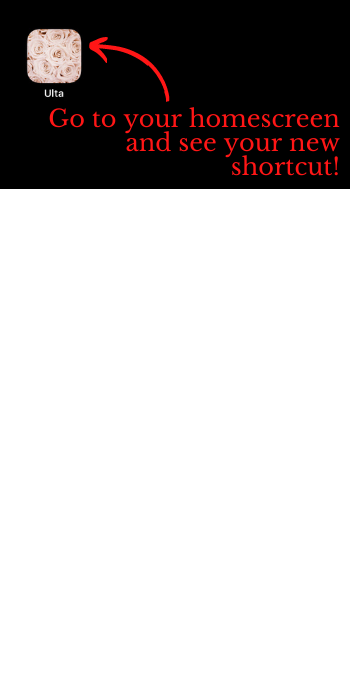
Step 10 - Check out your new App Shortcut: Head over to your home screen and your shortcut with your app and your custom icon will be ready! Enjoy!


For getting those large pictures on my screen: Download the Widgetsmith app
This is purely aesthetic, nonfunctioning (at least for me)
Step 1 - Select widget size: Click the size widget you want: small, medium, or large.
Step 2 - Change the widget: Click on the middle of the image to change it.
Step 3 - Rename the widget: At the top, there should be small wording that says “Tap to Rename”. Tap that and rename your widget.
Step 4 - Choose your photo: Click on the big picture of the widget again. Scroll down past the clocks and you’ll see Custom. Click the one that says “Photo”. Choose your photo and save it.
Step 5 - Add your new widget to the home screen. Go to the home screen and hold the screen down to edit home page, (you know, when all the apps start shaking and have and ‘x’).
Click the plus sign (+) at top left, search widgets, and choose Widgetsmith. Then you will be able to pick the size you were just editing and click “Add Widget”, it will add the last picture you added and you’re done!
If that didn’t work, or it chose the wrong image, you can click on the widget after it’s added to your Home Screen, it should flip over, and show you all ones you customized there for you to choose from.
For the pretty clock and calendar: Download Colorwidgets app
Step 1 - Choose your size. Tap on the size calendar/clock you want.
Step 2 - Add a background image to your widget. Scroll up and click “Background Image”, I suggest a solid color but add textures like fabric or metallic.
Step 3 - Finish customizing your widget. Select the other fonts and colors you prefer and click Set widget!
Have fun Customizing your home screen!
Have you updated yours yet or do you know of any other ways to do it? Comment below and let me know! Or if you have any questions about the process, comment below and I’ll answer them!